How to repair scratches on the surface of acrylic sheets Yifang teaches you how to repair scratches from scratch
$1.15 available: In StockQuick Overview: Zhejiang Yifang New Materials, with 20 years of production and processing, international standards, and a daily output of 70 tons.
How to repair scratches on the surface of acrylic sheets - Yifang teaches you how to repair scratches from scratch
Although acrylic sheets are beautiful and durable, their surface hardness is relatively low (about 2-3H), and various scratches are inevitable during daily use, transportation, or processing. Minor scratches can affect aesthetics, while deep scratches may affect transparency and overall texture. Many users think that the board is "useless" when they see scratches, but in fact, most scratches can be repaired - the key is to choose the correct repair method based on the depth of the scratches.
Scratches on acrylic sheets can be roughly divided into three levels: minor scratches, moderate scratches, and deep scratches. Different repair strategies are required for different levels of scratches.
Slight scratches (surface fine lines)
This type of scratch only stays on the surface of the board in a very shallow layer, visible to the naked eye but not noticeable to the touch of fingers. Commonly seen as marks caused by wiping with a rough cloth and slight friction during daily cleaning.
Moderate scratches (visible dents)
The scratch has already cut into the surface of the board, and the marks can be clearly seen. Fingers can feel the grooves. Commonly seen in friction during transportation and collision during installation.
Deep scratches (obvious damage)
The scratches are deep and have clearly damaged the surface of the board, which may even affect the structural strength of the board. This type of scratch repair is difficult and requires more professional handling.
Method 1: Minor Scratches - Toothpaste Repair Method
The simplest and most effective method for minor scratches on the surface is to use toothpaste.
Operation steps:
First, clean the scratched area with mild soapy water to remove surface dust and oil stains, ensuring a better repair effect
Take a small piece of non gelatin regular toothpaste (white paste, non transparent gel type) and apply it to the scratch
Gently wipe with pure cotton cloth, suede or soft cloth in circular motion
After wiping repeatedly for a few minutes, rinse with clean water and wipe dry to check the effect
Toothpaste contains fine abrasive particles that can gently smooth the edges of scratches and restore surface smoothness. If the effect is not significant at once, you can repeat the operation several times.
Acrylic special polishing agent: There are specialized acrylic scratch polishing agents on the market, which have more professional effects. Use particle free toothpaste or specialized acrylic polishing paste (such as a combination of coarse and fine polishing paste), and use a dust-free cloth or eyeglass cloth to wipe in circles until the scratches disappear.
Emergency method for wind oil essence: Apply wind oil essence to the scratch area, let it stand for 1-2 minutes, then wipe it with an alcohol swab, and finally dry it with a glasses cloth (only applicable to unpatterned acrylic surfaces).
Method 2: Moderate Scratches - Water Sandpaper Polishing Method
For deeper scratches, it is necessary to use water sandpaper for polishing treatment.
Operation steps:
Prepare 800 grit coarse sandpaper for preliminary polishing
When polishing, be sure to wet grind with water to avoid new scratches caused by dry grinding
Apply even force and gently polish along the direction of the scratch
Gradually transition to fine sandpaper with a grit of 1500 to 2000 for smoothing treatment
After polishing, a matte effect will form on the surface, which is a normal phenomenon
Rinse with clean water, then polish with a dry cloth dipped in toothpaste to restore shine
If scratches are still visible after polishing, it indicates that the sandpaper is not deep enough and needs to be reworked
Method 3: Deep Scratches - Multi stage Grinding+Polishing
For deep scratches, more detailed multi-stage processing is required.
Operation steps:
First, use thicker sandpaper (such as 400 grit) to polish the scratched area
Gradually upgrade to 600 mesh → 800 mesh → 1200 mesh → 1500 mesh → 2000 mesh, and polish step by step
After each level of sandpaper polishing, rinse with clean water to check the effect
Finally, use acrylic polishing agent for fine polishing
Wipe with soft fabric in circular motion until the surface is as shiny as new
For large and severe scratches, it is recommended to seek professional repair services.
Method 4: Flame Polishing Method (Professional Operation)
Flame polishing is a method of using high temperature to instantly melt the surface of acrylic and restore its luster. This method is suitable for large-area polishing, but it requires first using sandpaper to smooth out the scratched area.
Attention: Flame polishing requires professional skills, improper operation may cause deformation or burning of the board, and it is not recommended for non professionals to try.
Method 5: Automotive Polishing Tool Assistance
If the manual polishing effect is not ideal, a car electric waxing machine can be used in conjunction with toothpaste or car polishing wax for polishing. This method is more efficient and suitable for handling large-area scratches.
1. Clean first and then repair
Before repairing, the scratched area must be cleaned with mild soapy water to remove dust, oil stains, and impurities from the surface. Otherwise, these particles will cause secondary scratches during the repair process.
2. Control the intensity to avoid excessive polishing
When polishing, it is necessary to control the force well to avoid excessive force causing uneven surface or more serious damage. Sandpaper polishing should transition step by step from coarse to fine, without jumping. After sanding with sandpaper, the surface will atomize, but it can be restored to its shine by wiping it with toothpaste.
3. Grinding must be done with water
When using water sandpaper, it must be dipped in water for polishing. Dry polishing will generate a large amount of heat, which may cause local melting of acrylic or the formation of new scratches.
4. Choose the right tool
Use soft fabrics (such as suede, eyeglass cloth, microfiber cloth) for wiping
Avoid using cleaning agents or chemical solvents containing granular objects (such as alcohol, acetone, etc.)
Do not use rough paper to wipe, as too hard paper can also easily scratch the acrylic
5. Pay attention to the limitations of the repair
Not all scratches can be completely repaired:
Surface scratches can be repaired, but internal cracks cannot be repaired
There may still be slight marks after deep scratch repair
The repair process will slightly reduce the thickness of the board, and excessive repair is not recommended
6. Test first when unsure
If unsure how to fix it, it is recommended to conduct small-scale testing in inconspicuous places first. For severe scratches or extensive damage, it is recommended to seek professional repair services.
Instead of waiting for scratches to appear and then painstakingly repairing them, it is better to take preventive measures in daily use. Here are practical suggestions for preventing scratches on acrylic sheets:
1. Keep the protective film until the end
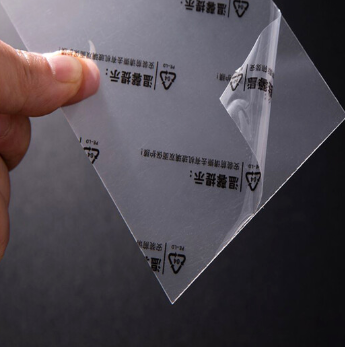
Acrylic sheets have a layer of PE protective film on the surface when they leave the factory. During processing, transportation, and installation, try to keep the protective film until the last moment before use before tearing it off. This is the simplest and most effective way to prevent scratches.
2. Correct cleaning method
Wipe with soft fabric (such as suede, microfiber cloth)
Using 1% soapy water and a soft cloth for cleaning not only wipes it clean, but also reduces the risk of getting dust on it
Avoid using cleaning agents containing abrasive particles
Avoid using organic solvents such as alcohol, acetone, banana water, etc
3. Storage and transportation protection
Small and sharp objects cannot be placed between the boards
Use foam or protective film when packaging to reduce friction
Avoid direct contact between the board and hard objects
4. Precautions during use
Avoid hard objects such as knives and keys from contacting the acrylic surface
Acrylic has a high coefficient of thermal expansion, and expansion space should be reserved during installation
The usage temperature should not exceed 70-80 ℃, as exceeding 100 ℃ will cause softening and deformation
5. Surface coating protection
For high demand application scenarios, surface coating protection can be considered to effectively prevent scratches from occurring. The surface hardness of hardened acrylic sheet can reach 4-5H, which is more scratch resistant than ordinary acrylic.
6. Regular maintenance
Using liquid polishing wax combined with a soft cloth for regular wiping can keep acrylic products shiny and shiny at all times.
| product type | pet、ps、acrylic、acrylic mirror、pvc sheet,acrylic sheet |
| thickness | 0.35-300mm |
| Styles | 1220*2440,1220*1830,500*900,50*60,960*1950,700*900/Customization of various specifications and sizes |
| delivery time | 5-8day |
| manufacture | Yifang |
related products